The goal of the Appian Guide Series is to demonstrate how to create a simple Appian business application through four parts. In the first guide, we will show you how to set up a basic Appian application, application architecture, database connection and user roles.
New Application
To create a new application, navigate to the toolbar and click on the “New Application” button. You will be prompted with the application creation wizard. In this example, we will create a new application from scratch for the custom solution. Other ways of creating applications are described in the official Appian documentation.
In the creation wizard, choose the application name and application description. Later, we will use application name initials to define objects for that application.
Let us create an application for approving vacation days.
Create application
Now that we have created the application, we need to set up basic security. We need to create two roles, one for viewing privilege and one for administration privilege.
To create a new group, click on “Add Users or Groups”. In the “User or Group” column, click on the small “+” button next to the input field. We will be prompted with another popup for creating a new user group. At this point, we need to input only the name and description. When naming a group, we should prefix it with application name initials which are “VAD” in our case. Let us name this group “VAD All Users” and give it viewing permission. Repeat the same procedure for the Admin group and give it the administration permission. After saving groups and permissions, our application is ready.
Application security
Application security overview
Application Architecture
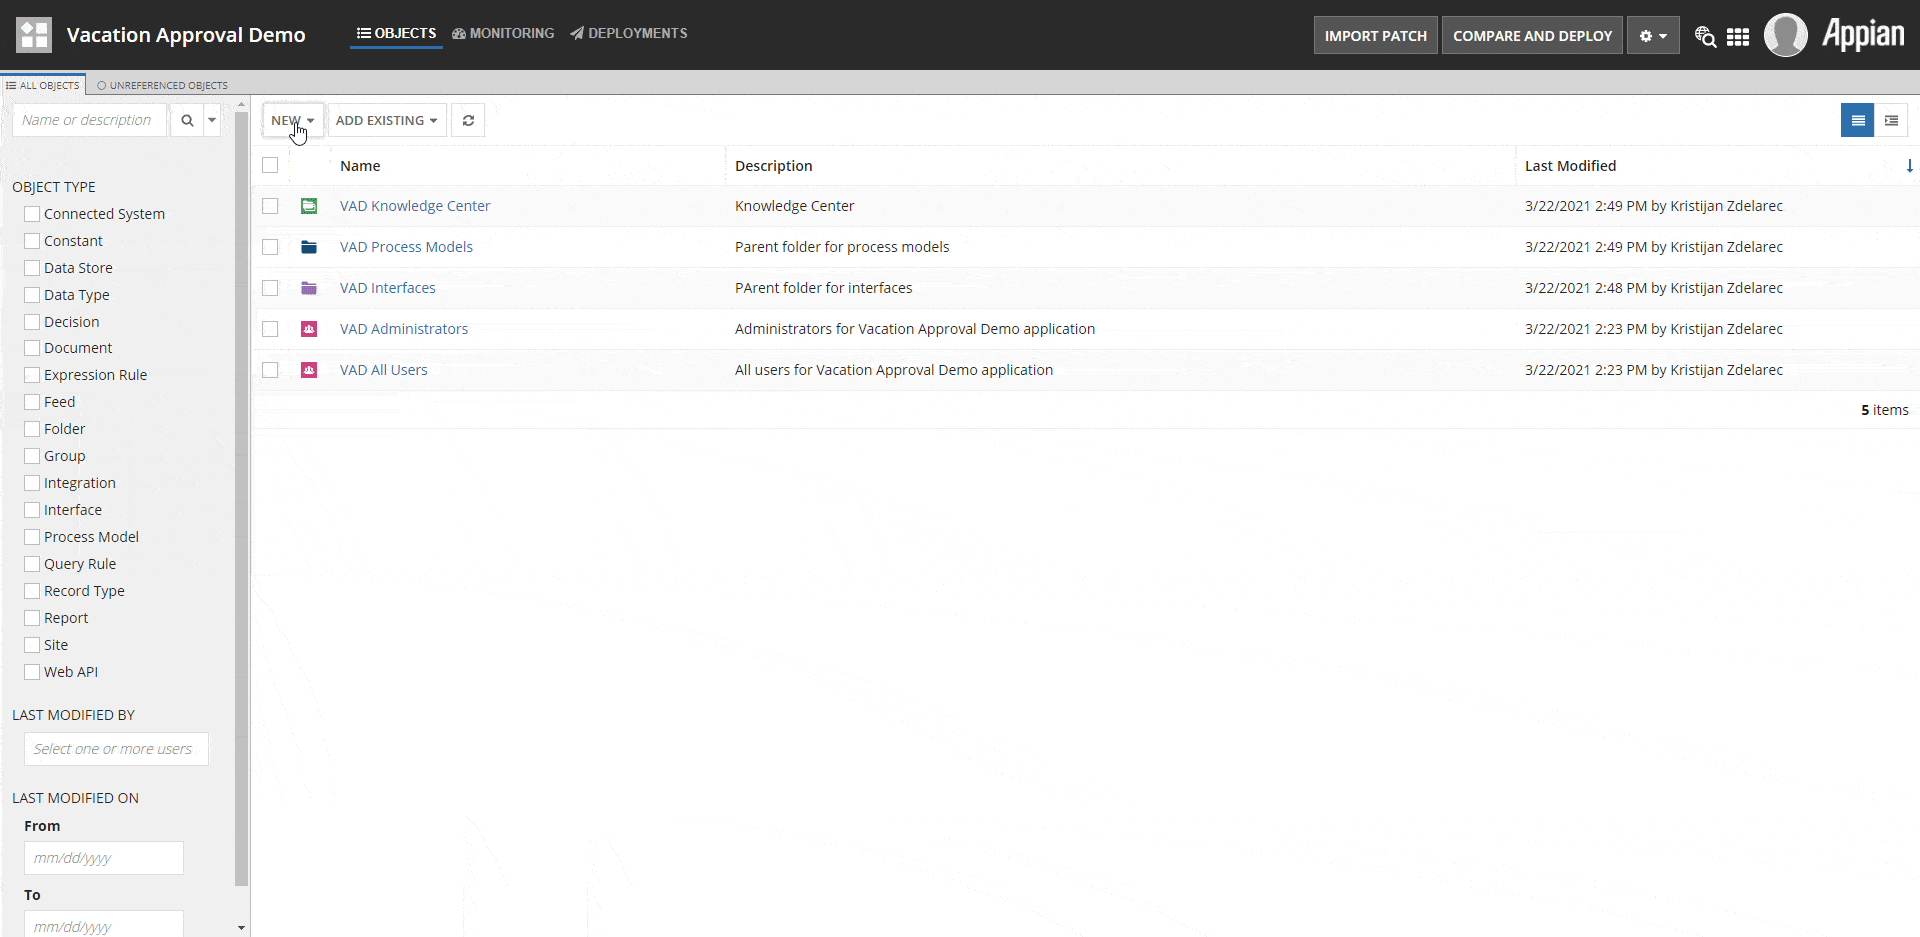
When creating new application objects, we need to save them in certain folders. To group object types, we need to create folder architecture as follows:
VAD Rules and Constants – used for saving expression rules and constants,
VAD Process Models – used for saving process models,
VAD Interfaces – used for saving interfaces,
VAD Knowledge Center – used as a parent folder for documents and images.
To create a new folder, navigate to the “New” dropdown in the toolbar and select “Folder”. In the creation wizard, select “Rule Folder” and give it a name with application name initials as a prefix, ex. “VAD Rules and Constants”. Also, enter a description and click “Create”. When creating folders for process models, select “Process Model Folder”, and when creating a Knowledge Center, select “Knowledge Center” type. Setup folder security as needed.
Folder creation
Appian Database Connection
Now that we have basic project architecture, we can establish a connection with our database. To connect the Appian application to an external database, navigate to the navigation menu and open “Admin Console”. This will redirect you to the Appian Administration Console, where you can find the “Data Sources” link in the “Integration” section. Clicking on the link will open a Data Source Management window where you can manage external database connections. You can read more about this in the official Appian documentation.
Data sources
For this example, we will be using an integrated Appian cloud database. The only thing that we need to do is to create a Data Store object which is responsible for establishing a database connection. We can create a new Data Store object by navigating to the “New” dropdown in the toolbar and selecting “Data Store”. This will open a pop-up dialogue where you can specify the Data Store’s name, description and select a correct data source. Note that the name should follow Appian guidelines and start with application name initials. After populating the dialogue, click “Create”. Setup data store security as needed. After creating a Data Store object, you will be redirected to the Appian Data Store Designer. At this point, you can close that tab as there are no actions that we can perform at this stage.
Data store
To be able to work with database tables, we need an object that will represent a database entity. In Appian, that object is called Data Type. There are a few ways of creating Data Types which are described in the official Appian documentation.
For this example, we will create a Data Type from the existing database table. To create a new Data Type, navigate to the “New” dropdown in the toolbar and select “Data Type”. Select “Create from a database table or view”, select correct Data Source and table and click continue. You will be prompted with a new window with data type properties.
Data type namespace should end with application name initials. Also, there is a data type preview which grants you an opportunity to change naming and types. Appian will automatically populate the data type with the correct naming style. When you are happy with all the information, click “Create” which will finish the Data Type creation process.
Data type
In this short guide, we have described how to set up a basic Appian application, how to create simple application architecture and how to connect that application to the database. Now that we have everything ready, we can start developing user interfaces, expression rules etc. Join us in part 2 of our Appian Guide Series, where we will go through designing an interface and connecting it with data types.
The project was co-financed by the European Union from the European Regional Development Fund. The content of the site is the sole responsibility of Serengeti ltd.
Get a Quote
To get an accurate quote, please provide as many details as possible. One of our key account managers will contact you back with a custom quote for your project.
Manage your privacy
We use technologies like cookies to store and/or access device information. We do this to improve browsing experience and to show (non-) personalized ads. Consenting to these technologies will allow us to process data such as browsing behavior or unique IDs on this site. Not consenting or withdrawing consent, may adversely affect certain features and functions.
Functional
Always active
The technical storage or access is strictly necessary for the legitimate purpose of enabling the use of a specific service explicitly requested by the subscriber or user, or for the sole purpose of carrying out the transmission of a communication over an electronic communications network.
Preferences
The technical storage or access is necessary for the legitimate purpose of storing preferences that are not requested by the subscriber or user.
Statistics
The technical storage or access that is used exclusively for statistical purposes.The technical storage or access that is used exclusively for anonymous statistical purposes. Without a subpoena, voluntary compliance on the part of your Internet Service Provider, or additional records from a third party, information stored or retrieved for this purpose alone cannot usually be used to identify you.
Marketing
The technical storage or access is required to create user profiles to send advertising, or to track the user on a website or across several websites for similar marketing purposes.
To provide the best experiences, we use technologies like cookies to store and/or access device information. Consenting to these technologies will allow us to process data such as browsing behavior or unique IDs on this site. Not consenting or withdrawing consent, may adversely affect certain features and functions.
Functional
Always active
The technical storage or access is strictly necessary for the legitimate purpose of enabling the use of a specific service explicitly requested by the subscriber or user, or for the sole purpose of carrying out the transmission of a communication over an electronic communications network.
Preferences
The technical storage or access is necessary for the legitimate purpose of storing preferences that are not requested by the subscriber or user.
Statistics
The technical storage or access that is used exclusively for statistical purposes.The technical storage or access that is used exclusively for anonymous statistical purposes. Without a subpoena, voluntary compliance on the part of your Internet Service Provider, or additional records from a third party, information stored or retrieved for this purpose alone cannot usually be used to identify you.
Marketing
The technical storage or access is required to create user profiles to send advertising, or to track the user on a website or across several websites for similar marketing purposes.